It's now after Christmas and I've been away from this project for a while and I need to gather my thoughts and ideas. I'm also preparing for a Zoom tutorial with Sian Martin so a summary is helpful.
As mentioned in the introductory chapters I have a fabric collage in mind incorporating a variety of techniques to decorate and portray the story behind the work.
A collection of elements so far:
The same image but with a numbered guide for each element which I'll deal with individually:
The importance of oak leaves - these feature on the inside page of my Grandmother's autograph book. I'm a bit obsessed! I love the shape of them and the many possibilities they offer up in their portrayal.
Following the Zoom sessions with Sian and the Stitched Textile Group I'm finding that the SHAPE and OUTLINE principles are resonating strongly especially with regard to the beautiful shapes of the oak leaves.
1a. Reverse applique [see chapter 6]:
1b. Fabric collage, worked on monoprinted silk with free machine embroidered detail and arranged according to the Fibonacci sequence:
1c. I wanted to make a spray of 3D oak leaves . I visited our local park to collect leaves and small branches to to help me understand and observe their shape and patterns of growth. .
I made the leaves using acetate fabric secured in an embroidery hoop. Over the acetate I lay random dyed silk and free machine stitched the leaf shapes. I then cut out the leaf shapes and dissolved the acetate in an acetone solution. This process plus pinning the leaves to a sheet of polystyrene enabled me to mould the leaves to the desired shape.
Health and safety. Acetone is highly flammable so it's essential to keep it away from any flames. A well ventilated room is required to avoid inhalation of toxic fumes.
To produce the leafy twig I added each leaf individually to the oak twig using wood glue. This worked well. I plan to wrap the twig stem with olive green thread. I'm delighted with the realistic look I've achieved here:
1d. The inside page of the autograph book with the beautiful leaf pattern. However, I dislike the background grid which was revealed on enlarging the image:
I really like the background the leaf pattern gives to the overall design so I decided to trace it off onto tissue paper [below] and plan to free machine stitch through the tissue paper onto a beautiful natural linen fabric using an olive green sewing thread:
2a ad 2b. The nurses uniforms. I have documented the process of making these in chapter 8. I'm delighted with these! They are worked on vintage napkins and I love their scalloped edges as they reflect the shapes of the oak leaves. However, the napkins are currently too wide [I needed the width previously to enable me to fit them into the embroidery hoop.
So how to make them narrower? Just folding up to the scalloped edges and machine stitching doesn't feel right:
So I've experimented below with cutting the napkins, turning in the edges and then working an insertion stitch to rejoin the edges in a way more appropriate to the design. Also in this way I can ensure the scalloped edges along the upper and lower edges are in alignment. I've used a linen thread to work a fine blanket stitch along both edges and have brought them together by weaving into the edges.
It's important to stitch evenly so I've pinned the fabric to some graph paper to help guide my stitching.
3.A friend of mine gifted me these buttons and fasteners following her mother's death. It feels very fitting to include them here especially as my Grandmother loved to sew and mend. The cards are
complete and in lovely condition.
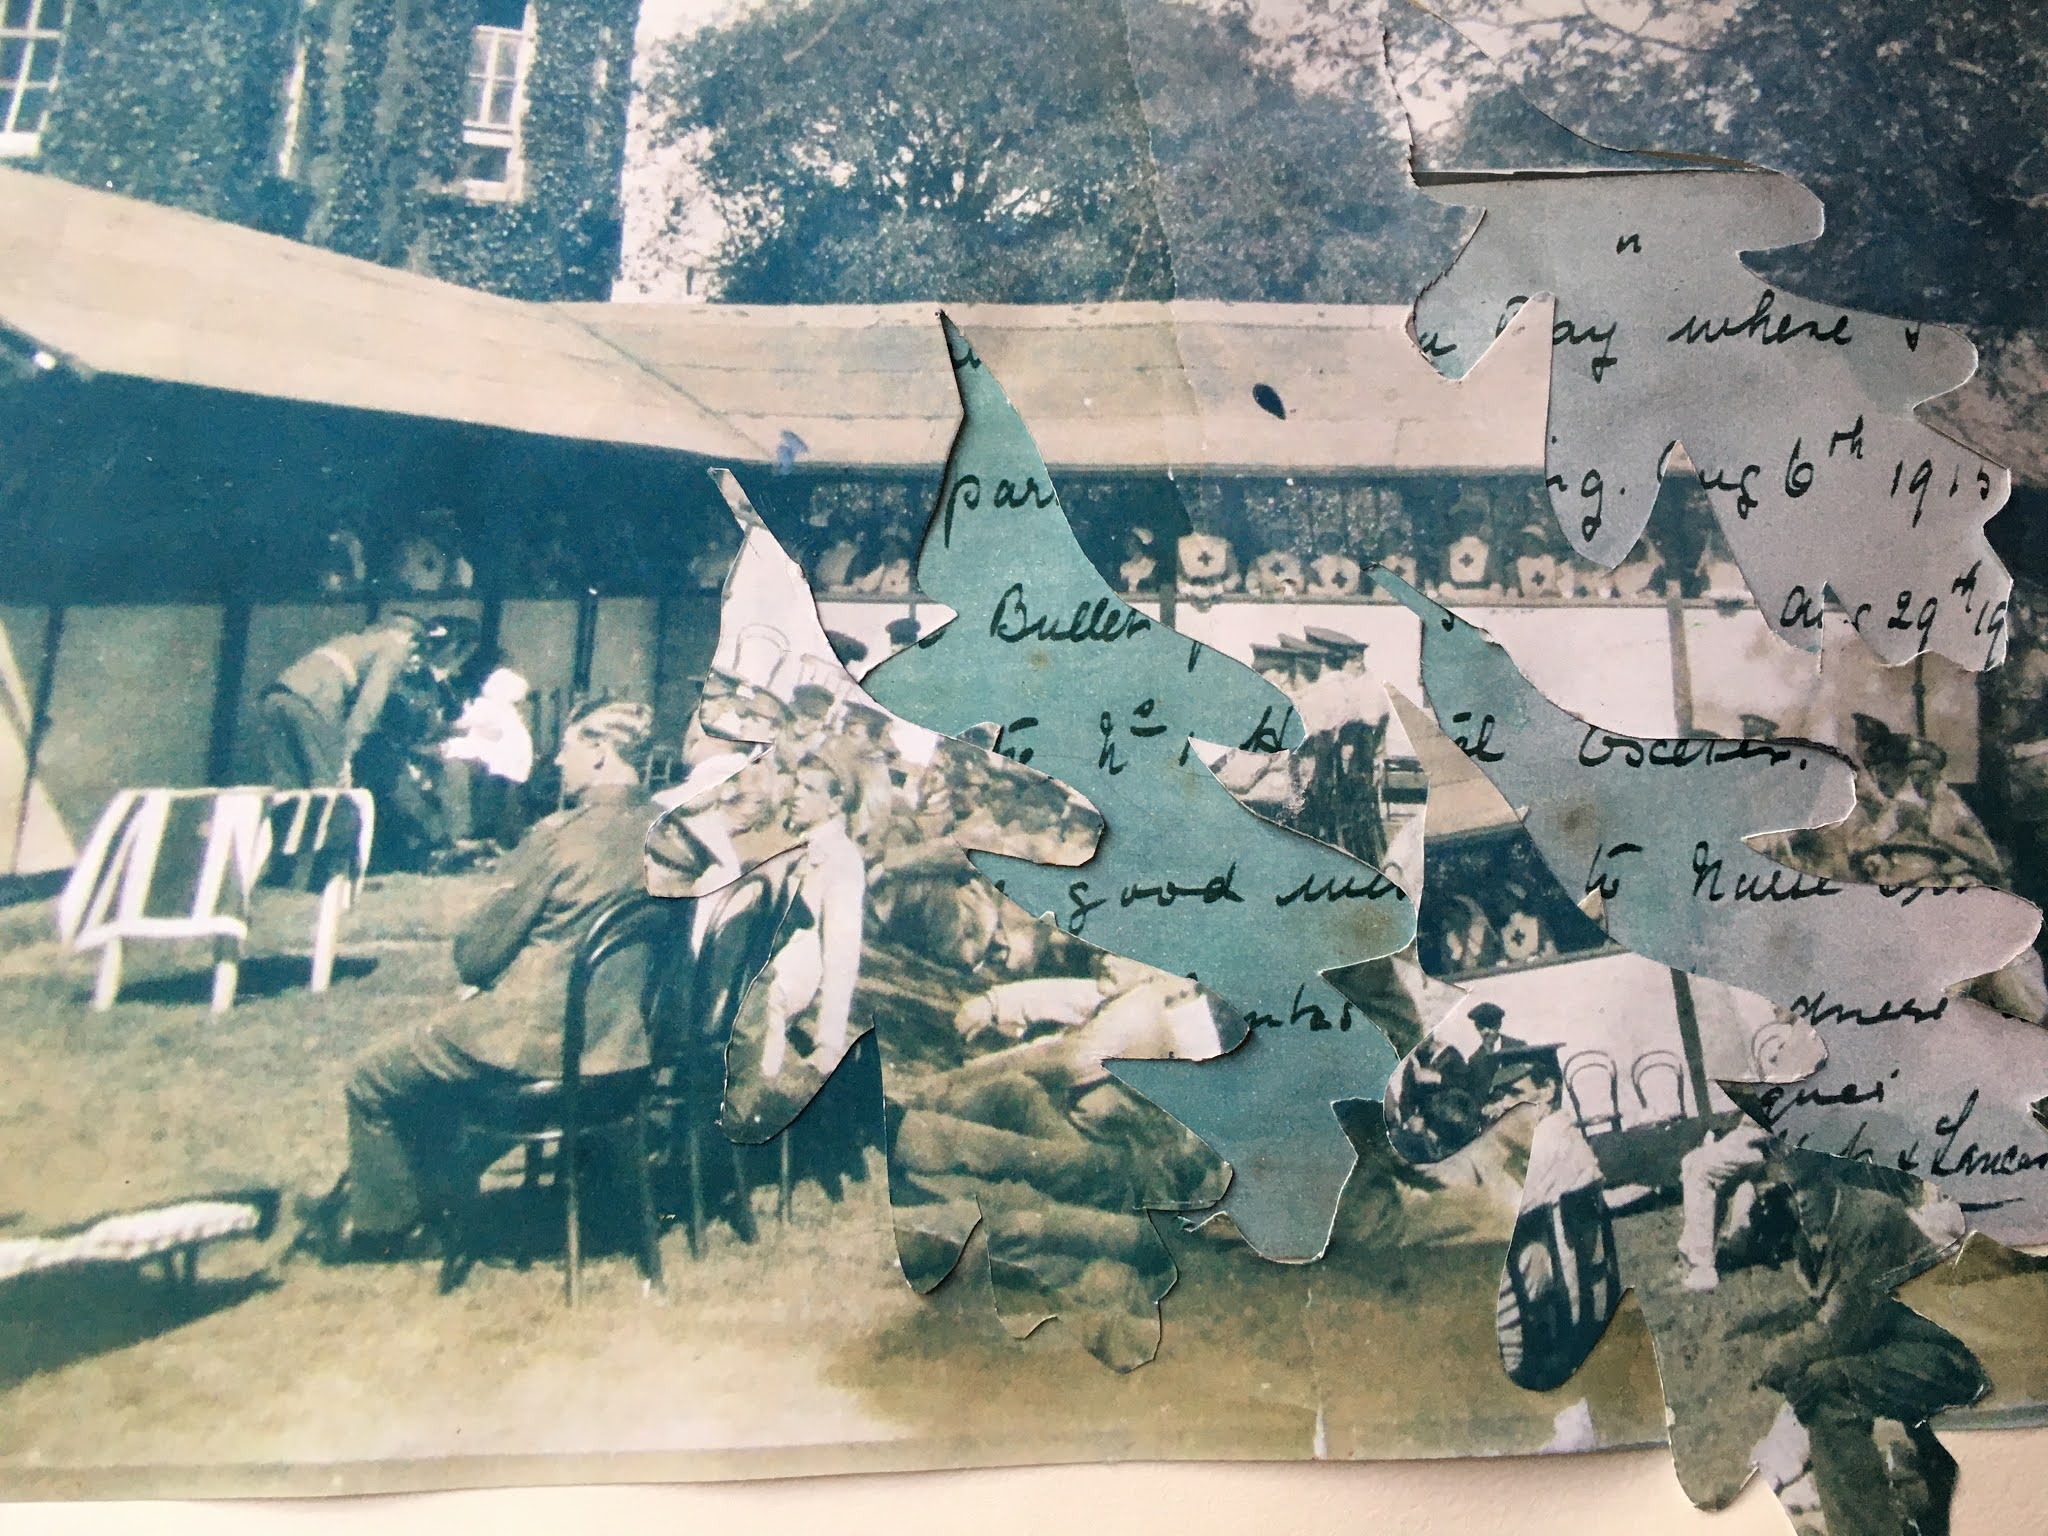
4. I'm fascinated by this photo of the clinic at Exeter, the soldiers waiting to be seen and the nurses lined up in their uniforms, I wonder what they were thinking?
I wonder, at this stage, about bringing together the above photo with some of the writing from the autograph book using reverse applique and free machine stitching to outline and highlight the oak leaf shapes. I'm fascinated by how the soldiers within the cut out shapes stand out, one of them apparently looking straight at me! Not sure about this, however, may need to rethink.
5. Extracts from the autograph book: I need to consider how to include these:
I'm toying with the idea of reproducing the autograph book as an added 3D feature to really bring the project to life and to ensure that it lives on and not forgotten.
6. Poppies. I love the idea of using these snap fasteners as poppy centres as they tie in with the fasteners above.
The poppies themselves are made up of a heavy space dyed calico over sponged with red and green acrylic paints and based on the shape of the poppies available around Remembrance Day.
7. The Red Cross. The cross on the design at the beginning of this chapter is made of paper sponged with red and green acrylic paints but I plan to take some red felt and add some painted
Bondaweb to give added texture and interest. Below is my Grandmother's Red Cross button which will also be added.
So this is the project so far, it still needs more work but having put it onto paper [or blog ] here I'll ponder at my leisure and enjoy discussing next stages with Sian.