Monday, 4 February 2019

Module 6 and chapter 1

Here I am starting work on the final module [6] for the City and Guilds certificate in embroidery with Distant Stitch guided by my tutor, textile artist, Sian Martin.

This module is entitled 'Creative Conservation' and will take me through the study of colours within sea and sky whilst exploring different drawing techniques to produce exciting mixes of colour and texture which will be translated into machine embroidery on interesting fabrics, including the use of water soluble fabrics to create wonderful lacey effects.I'll be working towards a final piece looking at the theme of conservation.

I started by researching water and sky scapes putting together some of my own photographs. I looked for interesting colour combinations and textural effects including water surfaces e.g. ripples, icy effects, waves, reflections, frothy bubbles and cloud formations. I live in Brighton and so have included some of my photographs showing the demise of the West Pier which was a most beautiful structure now collapsing into the sea.

I also researched paintings by artists and textile artists who have  featured sky and water effects as sources of their inspiration.

I have uploaded my sketchbook pages below showing images of my work plus  the accompanying notes.

Introduction - Photographic research and images


This gorgeous painterly sunrise comes by courtesy of my fellow Distant Stitcher Julia Green. 
Thank you!


And another from Google Search


And my own beautiful seaside sunset in Brighton


Chapter 1 - Drawing methods

This chapter involves the use of colour and textures seen in my reference images to investigate drawing techniques to show texture and small scale patterns. I've used a selection of drawing implements including coloured pencils, oil and chalk pastels, wax crayons, oil paint sticks, Neocolour Aquarelle, Inktense sticks and crayons, felt tip pens.


Experiments with Sgrafitto

Sgrafitto is the application of two layers of colour and the top layer scratched away to reveal the colour underneath.


Experiments with Frottage

Frottage is the use of textured and patterned surfaces to create rubbings. I used a selection of surfaces from around the house which were very effective but also made some of my own by sticking card shapes to a bottom layer of paper


I used some of the grid samples from Module 3 for rubbing but also made some of my own as below:


Resist methods

I used a selection of drawing implements which are water resistant to make marks and then applied a wash of coloured inks  to reveal beautiful patterns. 


I didn't feel happy with the results of the sgrafitto, frottage or resist methods. I realised that although some of the colours I used were appropriate to my research images some weren't.  
I decided to revisit these techniques.

Colour chart to concentrate my mind


Sgrafitto re-visited


Frottage re-visited


Resist revisited - I used the Frottage technique when applying the oil crayons to produce some interesting textural effects.


I was especially pleased with this one - oil pastels and coloured inks resist.


This feels so much better and makes more sense! Very pleased with these.

Discharge techniques

I applied bleach to various ink products using a range of implements, bleach will remove colour when applied to dried inks. Lovely results!


I always find this technique fascinating but I really loved the combination of Quink and other inks when they reacted to the bleach with some surprising colour effects.

Transparent surfaces

The application /sponging of emulsion or acrylic paint to a shiny or transparent surface such as tracing paper or cellophane was new to me and absolutely fascinating as the surface didn't absorb the paint leaving beautiful textures. Sandwiches of cellophane were then filled with acrylic paint, grated wax crayon, thread and fabric snippets and seed beads; then a cool iron was applied to slightly shrivel the cellophane and merge / melt the contents. [Care taken to protect my iron with baking parchment]. Absolutely wonderful and serendipitous!


I especially loved this as the weather was particularly icy when I did this one! 


Icy puddle produced with a cellophane sandwich!


Acrylic paint sponged and dragged over the edge of  a card stencil to give the effect of rolling waves.
At the bottom of the page I have tried using a piece of corrugated card to produce stormy seas.


Inspired by sample 1.14. Strong shapes produced with the edge of a credit card on cellophane  and painted sponged and dragged from the edge of the credit card and sandwiched to dramatic effect. 
I wanted to try and capture a rippled effect [sample 1.4  and had a go with some spiral stencil shapes. I had fun adding some Roses sweet papers to the sandwich!


Inspired by sample 1.1 Wave shapes produced with card stencil shapes, very pleased with this.
The lower image is a sample with random colours but I used too much paint so I decided to cut it in wavy lines to see what happened!


Inspired by sample 1.11. Sponged paint on cellophane with bubbles /froth depicted by the end of tiny plastic tubing


As I was sticking this in my sketchbook the sun shone across the page creating beautiful reflections


Inspired by sample 1.9  More stormy seas!
Below - application of crayons,pastels and paint to bubble wrap as a low relief.


Spongy packaging produced some more low relief effects


I really enjoyed this chapter despite my difficulty loosening up to draw and having to revisit some techniques - so glad I did as the results were very pleasing.

Monday, 17 December 2018

Composite sheet for resolved sample mod 5

We are required to make up a composite sheet of the ideas, samples and images which direct us to the resolved sample

Composite sheet part 1
Composite sheet 2


Composite sheet combined:


This takes me on the journey from the early research images of cow parsley through to background leaf prints, paper representations, fly stitch, fabric manipulations and the final workings of the the cow parsley florets as documented in the chapters of this module. 

Tuesday, 11 December 2018

Evaluation and verification

Evaluation


Verification - me and module 5!


Costing and timing


Costings

Sheets of black paper x 4            16p

Acrylic paint                                37p

Glue                                             50p

Mounting and box frame             estimated cost £40 [ being made by my husband]

Silk fabric for mounting / backing  £5

Fabrics                                            £15.08

Threads                                           £9

Beads                                               50p

Polyester wadding                           50p

Ribbons                                           £1.20

Hollyhock seeds                             Free natural resource!

Timing

Design 3 hours
Making up and stitching 70 + hours


Health and Safety Rules Observed


Health and safety rules observed

First and foremost I’d like to mention the working environment ensuring the that I have enough space in which to work and sit comfortably, taking regular breaks from a sedentary position to stretch my back, neck and shoulders.

In addition it is important to ensure:

  • safety of electrical flexes ensuring that those trailing from to plug/ extension lead to appliance are safely positioned and not likely to cause trips or falls or injuries incurred by a
    shifting sewing machine, iron or soldering iron. This includes not only myself but any visitors, elderly or young children
  • the safe positioning of heat tools such as an iron, soldering iron whilst in use, making use of appropriate stands in between their application. Ensure that these are turned off after use and safely stored.
  • adequate ventilation in the work space with an open window whilst heat / melting tools are used to melt fabrics / threads to avoid inhalation of toxic fumes.
  • careful positioning of candles used for melting fabrics / threads to prevent papers / fabrics in the surround from catching light. Be prepared for a possible flare up of fabric or thread especially synthetics and work on a flame proof surface with a damp cloth within reach. Ensure that they are extinguished fully when finished with.
  • Safe storage of bleach and any other corrosive fluids whilst in use and safe disposal when finished with. Work in a ventilated room to avoid inhalation and guard against spillage onto skin to avoid burning and have a damp cloth nearby for wiping any spillage, wash skin in cold water if necessary. Storage in a safe place when finished with out of the reach of children.
  • careful storage of sharp implements such as scissors, craft knives and scalpel blades especially if there are young children around in which case keep them out of reach.
  • careful storage of beads and buttons and other small objects especially if there are young children around.
  • Awareness of and careful storage of any seeds / leaves /petals / berries and their potential harm especially in the presence of children

Study Three Artists


STUDY THREE ARTISTS

We have been given 2 artists to research into as relevant to this module and then have to select one of our own choice.

1. Jennie Rayment
Jennie Rayment is internationally known for her quick, simple, innovative and original techniques with manipulated fabric

Jennie teaches a wide variety of classes for all levels and abilities of those working in patchwork, quilting and embroidery to fashion, soft furnishing and home décor enthusiasts.
Much of her work is created in simple calico and her elegant ideas may be adapted for any type of fabric and used to make quilts, wall hangings, boxes, baskets, cushions, table linen and of course fashion garments and accessories.


She has written many books and articles on fabric manipulation techniques and many of these titles are still in print material hence the magic goes on and on.

Nowadays, her work is exhibited in various galleries, at shows and exhibitions around the world.

Jennie saw her first piece of patchwork and made her first quilt in 1989. Having never sewn other than family mending and household repairs, it was a steep learning curve!
Over the next few years, Jennie explored and experimented and by 1994, she was firmly hooked on all forms of patchwork and quilting. In this period she completed a teaching diploma and became involved with the City & Guilds.

She taught the Creative Studies course in Patchwork, Quilting and Appliqué to several groups in the South of England. Within the syllabus one of the required subjects was texture. As there was very little information available on this topic, Jennie created her own designs and techniques thus developing her own ideas and techniques.

Information from: 
www.jennierayment/about-jennie


2. Michael Brennand Wood

He is described as a visual artist, curator, lecturer, arts consultant and is internationally regarded as one of the most innovative and inspiring artists working in textiles. He has occupied a central position in the research, origination and advocacy of Contemporary International Art Textiles.


He believes that the most innovative contemporary textiles emanate from an assured understanding of both textile technique and history and his work has been defined by a sustained commitment to the conceptual synthesis of contemporary and historical sources, in particular the exploration of three dimensional line, structure and pattern. He has persistently worked within contested areas of textile practice, embroidery, pattern, lace and recently floral imagery.
Michael has explored and developed his own techniques inventing many new and imaginative ways of integrating textiles with other media.

Examples of Michael's work can be seen in major public, corporate and private collections worldwide including the Victoria and Albert Museum, the 21st Century Museum of Contemporary Art, Kanazawa and National Gallery of Australia, Canberra. He won The Creative Concept Award in 1987 and The Fine Art Award in 1989 at the International Textile Competition in Kyoto, followed by the first RSA Art for Architecture Award 1990.
In 1982 he curated the controversial exhibition ‘Fabric and Form’ and co-curated the ‘Makers Eye’ both for the Crafts Council, followed in 1992 with ‘Restless Shadows’ a major Goldsmiths College touring exhibition of contemporary Japanese Textiles. Until 1989 he was a senior lecturer in the department of visual art at Goldsmiths College, University of London. He has taught extensively in colleges and universities in the UK and overseas, and has undertaken residencies in Japan, Australia, New Zealand, Canada, and Belgium. He was appointed Visiting Professor at Manchester Metropolitan University in 2005 and is Research Fellow at the University of Ulster.

Recent work inspired by traditions of floral imagery have utilised computerised machine embroidery, acrylic paint, wood, glass and collage. Exploring the illusionary space between two and three dimensions, these works are colourful, dramatic, rhythmic and holographic in feel with intense detail that merges at a distance into strongly optical configurations.

Adapted from brennand-wood.com/michael html


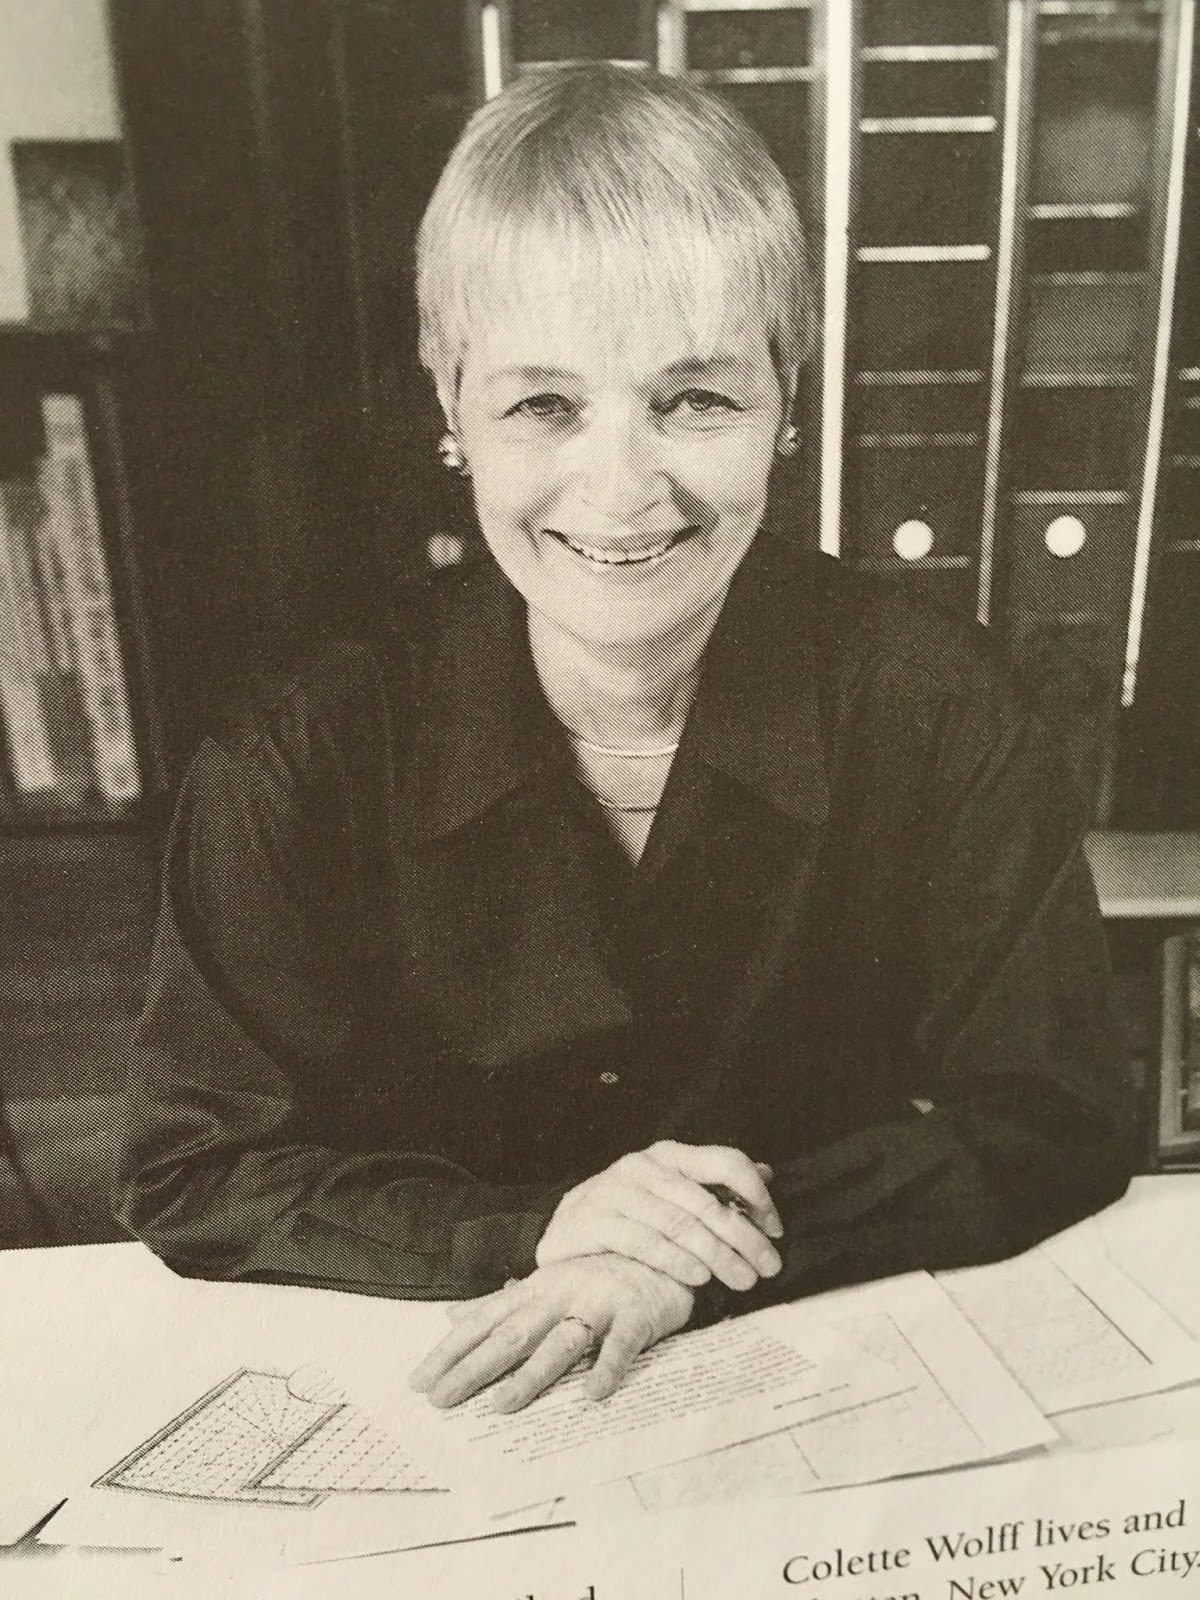
3. Colette Wolff

My own selection of artist for this module is Colette Wolff, a textile artist living in New York City, whose book entitled The Art of Manipulating Fabric, has been a joy to use and take inspiration from thus enabling me to study techniques and then adapt them for my own purposes.


Colette describes her work as one which changes the look and feel of cloth with the assistance of a threaded needle thus adding texture, embellishment, inflation and support. Such techniques create puckers, folds, waves, puffs, projections and openings. Stitching by hand or machine they resurface, reshape, restructure and reconstruct a flat piece of cloth into one with a completely different look and feel.


Colette states that most of the techniques materialised during the long history of cloth with those handling the cloth and modifying and altering the original into something innovative and different! just as I have. I find this fascinating.

Colette’s research and curiosity led her to look at tucks and pleats and from there into smocking, shirring, gathering etc. and how they relate. Her book resulted from a desire to have a comprehensive and orderly reference for such techniques allowing her to pick and chose and make her own decisions regarding their application.
Using plain 100% unbleached calico she found the bland colour an ideal medium with which to showcase the manipulation techniques whilst utilising it’s receptive qualities to light and in turn, shadows cast.

Personally I found the chapter on smocking, namely North American smocking an absolute joy which brought back memories of my own mother making beautiful cushions in the 1960s and 70s.
Now I was able to turn the technique on its head by working from the wrong side and then alternating rows to create new patterns and textures suited to my needs.

Historically Colette was introduced to embroidery by her grandmother at an early age and then her mother taught her how to use a sewing machine cementing fabric, needle and thread as constants in her life. She went on to make her own clothes as a teenager.

In the late 1960s a craft shop owner persuaded Colette to teach a quilting workshop. Her local library had 2 quilting books from which she designed a quilt block project and devised a lesson plan. This was one of her first experiential learning sessions
She later owned a mail order catalogue called Platypus which published her toy and doll designs and sold supplies. The quality of her work was noticed by an editor named Robbie Fanning and resulted in publication of The Art of Fabric Manipulation.

Colette states that she could write an autobiography around the garments, needlework, quilts, toys and textile art associated with memorable events in her past.
Colette has contributed articles and designs to many craft and textile publications
and has taught/lectured the art of fabric manipulating since the 1970s.

Information from:
The Art of Manipulating Fabric by Colette Wolff. Published in 1996. Krause publications.

www.clothdollmarket.com/colettewolf


Tuesday, 27 November 2018

Chapter 12 continued. Stitch trial samples - using extreme contrasts.

Following on from my last entry in August and my beginning of chapter 12 several decision have  since  been made.

Firstly I've decided to work in all white / cream fabrics and threads to enable me to achieve the translucency, frothiness and some of the magic I feel when I come across cow parsley in the hedgerows.
Secondly I've made a slight change to the samples chosen for this piece and have decided upon samples 2a, 3a and 3c [photos of these are posted in my previous entry for ch 12].
Thirdly we are asked to consider whether areas of the design would be worked on the same level or  raised from the surface. I found that as I worked each piece took on a life of it's own and I'll explain this as I go.

I'm reposting an image of my paper design to start with, we are to work from this and not from our original photos.

As you can see the different parts are numbered
1 = sample 3c
2= sample 3a
3= sample 2a
4= the surrounding areas

I'll talk about each sample in turn and use photos to demonstrate the inspiration from paper to stitching.
I have used a background of quilted fabric as a base and this is revealed between each sample. [see sample 10 in chapter 5]. This is worked on Chinese silk over wool backing with free machine embroidered Vermicelli stitching, the sample was then washed at 60 degrees to shrink the wool and produce a quilted effect.

Sample 3c paper design detail


Sample 3c stitched sample
I have used white Stranded Cotton, Cotton Perle and worked  Detached Chain and Fly Stitches in a directional fashion plus French Knots in a linen thread topped by more Detached Chain in ivory and white ribbons. Painted Hollyhock seeds have been threaded through tunnels of white Chiffon and arranged to represent the 'florets' on the paper design and couch stitched into place. I've used a polyester wadding to raise the surface of the 'florets' and then secured it with slip stitches to the background fabric.


Sample 3a paper design detail:


Sample 3a stitched.
 Several bundles of florets using Hollyhock seeds [painted white]  have been trapped between 2 layers of white chiffon with white thread wrapped around the necks of the seed pockets. As I worked I was delighted to discover that they developed into  little puffballs which settled into a naturally shaped soft round ball which just needed stitching into place!


Sample 2a Paper detail:


2a Stitched sample. 
I worked on an ivory silk fabric and stitched free machine embroidered discs worked in an embroidery hoop for support. After which I used polyester machine thread to gather the fabric around the necks of the discs which in turn created beautifully formed pleats which reflected the shapes within the American Smocking and the Fly Stitching in the surround


Sample 4 top left corner paper design detail


Stitched sample using the American smocking technique on Chinese silk with 2 strands of white Stranded Cotton. The smocking is distorted by working one row on the right side and alternates on the wrong side and then manipulated to fit the space. I was also aware of working in a directional fashion to compliment the design. I feel the ripples of the monoprinting is reflected in the smocking effectively although sometimes the needle and thread lead the way! 


Sample 4 bottom left paper design detail:


Stitched sample on shot silk with a polyester sewing thread using a larger scaled American  smocking  again distorted and manipulated. This took on a beautiful curved effect giving this corner a wonderful feeling of movement which really reflected the shapes of the monoprinted design. There is a Fly stitch edge which I'll deal with separately


Sample 4 top right and corner paper design detail:


Stitched sample worked on Chinese silk with Polyester thread with a Fly stitched edging worked in a thick silk yarn


Sample 4 bottom right paper design detail


Stitched sample a finer American Smocking worked on Chinese silk with fine polyester thread. [the quilted background is visible here too.


Throughout the work on this piece Fly and Feather Stitches are represented on the monoprinted papers and in this example which is a detail of the right hand side of the paper design I've used both American Smocking and Fly / Feather stitches


Fly and feather stitches worked in layers and in between using a combination of silk, stranded cotton and linen threads. I am delighted with the textures achieved here especially as they merge with the American Smocking.


Fly stitch left edge paper design detail:


Lots of wonderful opportunities for creating texture with Fly Stitch here using a thick and finer silk yarns in layers and in a directional fashion to reflect the shape of the design:


Bottom section of paper design showing monoprinted marks:


Lots of exciting opportunities to work a flowing Fly Stitch in linen threads, sweeping between the samples


Paper design detail top of design:


Fly stitch at top of resolved sample.


And last but not least! My resolved sample.
I've been thinking about the edges and have decided that whilst some will be softly turned under where it seems fit the others will be left to spread where the stitching has created beautiful undulating folds and ripples to add to the sense of rhythm and movement of the finished piece.
 To finish this resolved sample will be placed on a length of fabric stretched over a support and placed  in a box frame with space around to compliment the beauty of the edges


I'm delighted with the outcome of this piece of work. 
Many hours of stitching involved but I love the translucency, the rhythm and the delicacy of the floret samples. I can remember American Smocking being in fashion in the 1960s and 70s when I was a teenager so it was a thrill to put my own take on them!!