So what is a thread?
A
thread is defined as anything that can be threaded through a fabric
surface and in this instance we have been encouraged to use
traditional embroidery threads plus more diverse and interesting non
traditional threads such as knitting yarns, machine threads, metallic
threads, wire, string, ribbons, strips of fabric and plastic, dried
grasses, shoe laces and raffia. These could also include solid items such
as sticks, twigs, hair pins etc. A whole range of exciting textures to
explore as we experiment with different 'threads' which to stitch.
A
variety ‘of threads’ are featured in the photos below –
examples of those gathered as part on my research for this chapter.
9.1


Stitches
and Stitching
There
are hundreds of embroidered stitches to learn and play with and we
have been asked to to experiment with a variety of shapes and
formation. I have taken inspiration from the following sources:
The
Constance Howard Book of Stitches Constance Howard Batsford 2005
Stitches:
New Approaches Jan Beaney Batsford 2004
Embroidery
Jessie Hughes Evans Practical Handbooks 1963
Stitchschool.blogspot.co.uk
Youtube
Bees needlework videos
artanddesigns.com/glossary
www.needlenthread.com
Here is my work in progress! A sunny day in my studio. Stitching and coffee - great combination:
9.2
9.2

I've looked at each batch of stitches for labelling purposes:
9.3 Flat
stitches 1
1.
Back stitch
2. Arrow stitch
3. Cross stitch
4. Chevron stitch
5. Satin stitch

9.4 Flat
stitches 2
1.
Thorn stitch with thread used for spine
2.
Thorn stitch without spine
3.
Dot stitch
4.
Darning
5.
Stem stitch in various sizes

9.5 Looped
Stitches
1.Wave stitch
2.Buttonhole /
blanket stitch
3.Feather stitch
4. Fly stitch
5. Cretan stitch

9.6 Chained
stitches 1
1. Cable chain
2. Double chain
3. Detatched chain
4. Twisted chain

9.7 Chained
stitches 2
1.
Braid stitch in
metallic threaded
2. Braid stitches
3.Wheatear stitch
4. Split stitch
5. Braided chain

9.8 Knotted
stitches
1.
French knot
2. Bullion knot
3. Coral knot
4. Antwerp stitch
[knotted blanket stitch]
5. Knotted diamond stitch
6. Peking or Chinese knot

9.9 Composite
stitches 1
1.
Whipped chain
2.
Raised chevron
3.
Chevron stem
4.
Raised chain
5.
Raised stem stitch
6.
Portugese border stitch
7. Laced herringbone
stitch

9.10 Composite
stitches 2
1.
Guilloche border stitch
2.
Pekinese threaded stitch
3. Twisted lattice made up
of a double and twisted
herringbone

9.11 Another composite stitch below:
Needle weaving
Although the Hollie stitch below is another knotted stitch, worked here in error!

Stitch effects
Treating the stitch as a way of mark making, looking at how a stitch is formed, the size, shape, how it looks in a group or built up as a single unit. I'm looking for interesting patterning and negative spacing which give way to exciting rhythms.
I selected the Fly Stitch - read on below:
9.12 and 9.13

 This was very exciting - working with stitches to develop different effects, this was the first set and made up of formal stitch rhythms. I loved the surprising patterns which emerged, really exciting challenge!
To add to the excitement the next exercise was to create informal effects with the same stitch, these are not to be random but rather more thought out to bring about more rhythmic patterns. I took the original formal stitch samples and did a sketch to try and transform them into an informal representations as presented below.
Here are 2 sheets of the transformations:
9.14, 9.15 & 9.16


This process has been fascinating. The possibilities posed by the variations of a single stitch in this way and the energy they create within themselves has been very exciting.
I'm looking forward to the next stage and making rubbings from my paper reliefs in chapter 3 to provide added inspiration for stitching.
Rubbings from Paper Relief Surfaces in Chapter 3
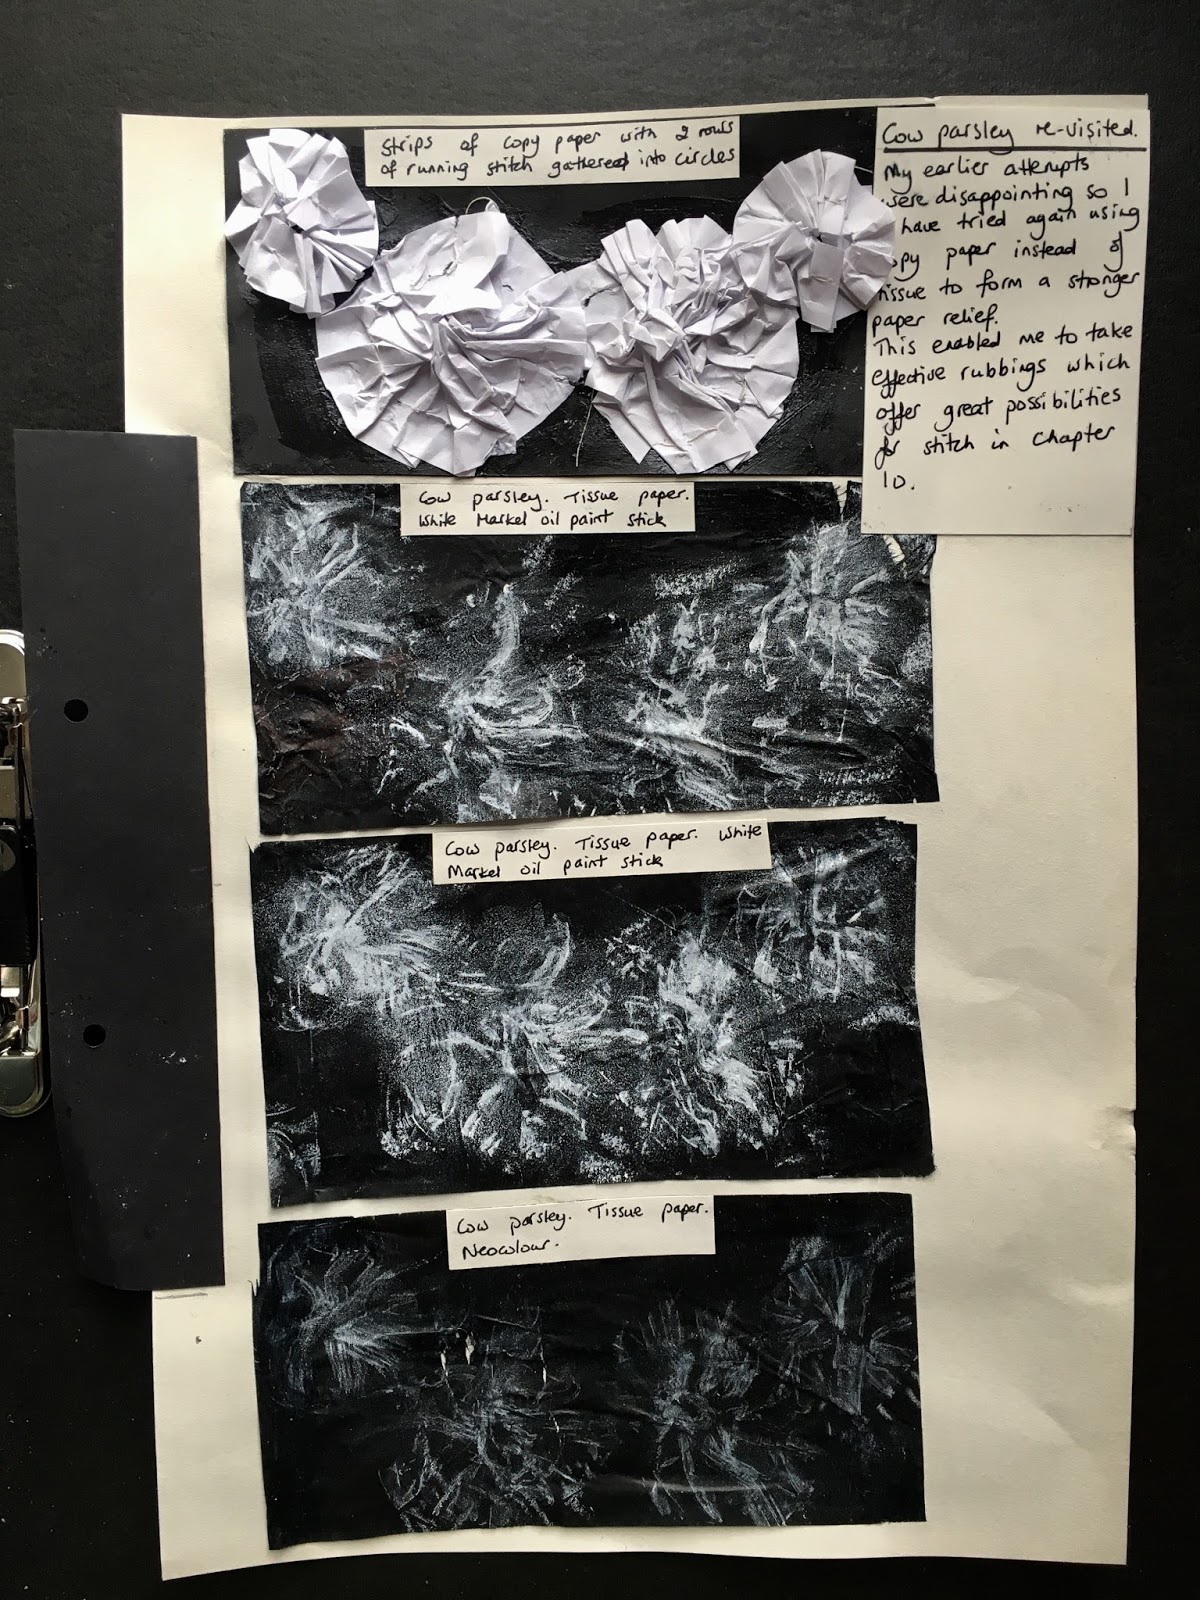
Through taking rubbings of my relief surfaces I have created marks that relate to the surface beneath whilst creating a different interpretation; through this they provided a fresh perspective.
I've used light weight black papers i.e. tissue paper and a 80 gsm paper [other heavier papers were too thick for a rubbing to appear] with either a white Markel Oil Paint Stick or Caran D'Ache Neocolor wax pastels which were both soft enough to create a good rubbing whilst other harder crayons etc left a poor result and tended to tear the papers.
Another option was a white copy paper rubbed with a white candle to form a resist against a wash of black Quink Ink.
Each sample is labelled accordingly below:
9.17, 9.18, 9.19, 9.20 & 9.21


 These will be used to inform stitchery in the next chapter and to provide new textural and design ideas where a different angle is required on a raised surface.
I can see many possibilities already and can't wait to get started on these!
Through taking rubbings of my relief surfaces I have created marks that relate to the surface beneath whilst creating a different interpretation; through this they provided a fresh perspective.
I've used light weight black papers i.e. tissue paper and a 80 gsm paper [other heavier papers were too thick for a rubbing to appear] with either a white Markel Oil Paint Stick or Caran D'Ache Neocolor wax pastels which were both soft enough to create a good rubbing whilst other harder crayons etc left a poor result and tended to tear the papers.
Another option was a white copy paper rubbed with a white candle to form a resist against a wash of black Quink Ink.
Each sample is labelled accordingly below:
9.17, 9.18, 9.19, 9.20 & 9.21


I can see many possibilities already and can't wait to get started on these!


No comments:
Post a Comment