Monday, 2 April 2018

Module 5 Chapter 9 Threads and Stitchery

This chapter is about looking at threads and their purpose for this module.

So what is a thread?
A thread is defined as anything that can be threaded through a fabric surface and in this instance we have been encouraged to use traditional embroidery threads plus more diverse and interesting non traditional threads such as knitting yarns, machine threads, metallic threads, wire, string, ribbons, strips of fabric and plastic, dried grasses, shoe laces and raffia. These could also include solid items such as sticks, twigs, hair pins etc. A whole range of exciting textures to explore as we experiment with different 'threads' which to stitch.
A variety ‘of threads’ are featured in the photos below – examples of those gathered as part on my research for this chapter.

9.1


Stitches and Stitching
There are hundreds of embroidered stitches to learn and play with and we have been asked to to experiment with a variety of shapes and formation. I have taken inspiration from the following sources:
The Constance Howard Book of Stitches Constance Howard Batsford 2005
Stitches: New Approaches Jan Beaney Batsford 2004
Embroidery Jessie Hughes Evans Practical Handbooks 1963
Stitchschool.blogspot.co.uk
Youtube Bees needlework videos
artanddesigns.com/glossary
www.needlenthread.com

Here is my work in progress! A sunny day in my studio. Stitching and coffee - great combination:


9.2


I've looked at each batch of stitches for labelling purposes: 


9.3 Flat stitches 1
1. Back stitch
2. Arrow stitch
3. Cross stitch
4. Chevron stitch
5. Satin stitch


9.4 Flat stitches 2
1. Thorn stitch with thread used for spine
2. Thorn stitch without spine
3. Dot stitch
4. Darning
5. Stem stitch in various sizes


9.5 Looped Stitches
1.Wave stitch
2.Buttonhole /
 blanket stitch
3.Feather stitch
4. Fly stitch
5. Cretan stitch

9.6 Chained stitches 1
1. Cable chain
2. Double chain
3. Detatched chain
4. Twisted chain


9.7 Chained stitches 2
1. Braid stitch in 
metallic threaded
2. Braid stitches 
small / large versions.
3.Wheatear stitch
4. Split stitch
5. Braided chain


9.8 Knotted stitches
1. French knot
2. Bullion knot
3. Coral knot
4. Antwerp stitch
 [knotted blanket stitch]
5. Knotted diamond stitch
6. Peking or Chinese knot


9.9 Composite stitches 1
1. Whipped chain
2. Raised chevron
3. Chevron stem
4. Raised chain
5. Raised stem stitch
6. Portugese border stitch
7. Laced herringbone
    stitch 


9.10 Composite stitches 2
1. Guilloche border stitch
2. Pekinese threaded stitch
3. Twisted lattice made up
 of a double and twisted 
herringbone


9.11 Another composite stitch below:
Needle weaving 

Although the Hollie stitch below is another knotted stitch, worked here in error!


Stitch effects

Treating the stitch as a way of mark making, looking at how a stitch is formed, the size, shape, how it looks in a group or built up as a single unit. I'm looking for interesting patterning and negative spacing which give way to exciting rhythms.

I selected the Fly Stitch - read on below:

9.12 and 9.13

This was very exciting - working with stitches to develop different effects, this was the first set and made up of formal stitch rhythms. I loved the surprising patterns which emerged, really exciting challenge!


To add to the excitement the next exercise was to create informal effects with the same stitch, these are not to be random but rather more thought out to bring about more rhythmic patterns. I took the original formal stitch samples and did a sketch to try and transform them into an informal representations as presented below.

Here are 2 sheets of the transformations:

9.14, 9.15 & 9.16


This is the informal set as a finished sheet of samples. 
This process has been fascinating. The possibilities posed by the variations of a single stitch in this way and the energy they create within themselves has been very exciting.

I'm looking forward to the next stage and making rubbings from my paper reliefs in chapter 3 to provide added inspiration for stitching.


Rubbings from Paper Relief Surfaces in Chapter 3

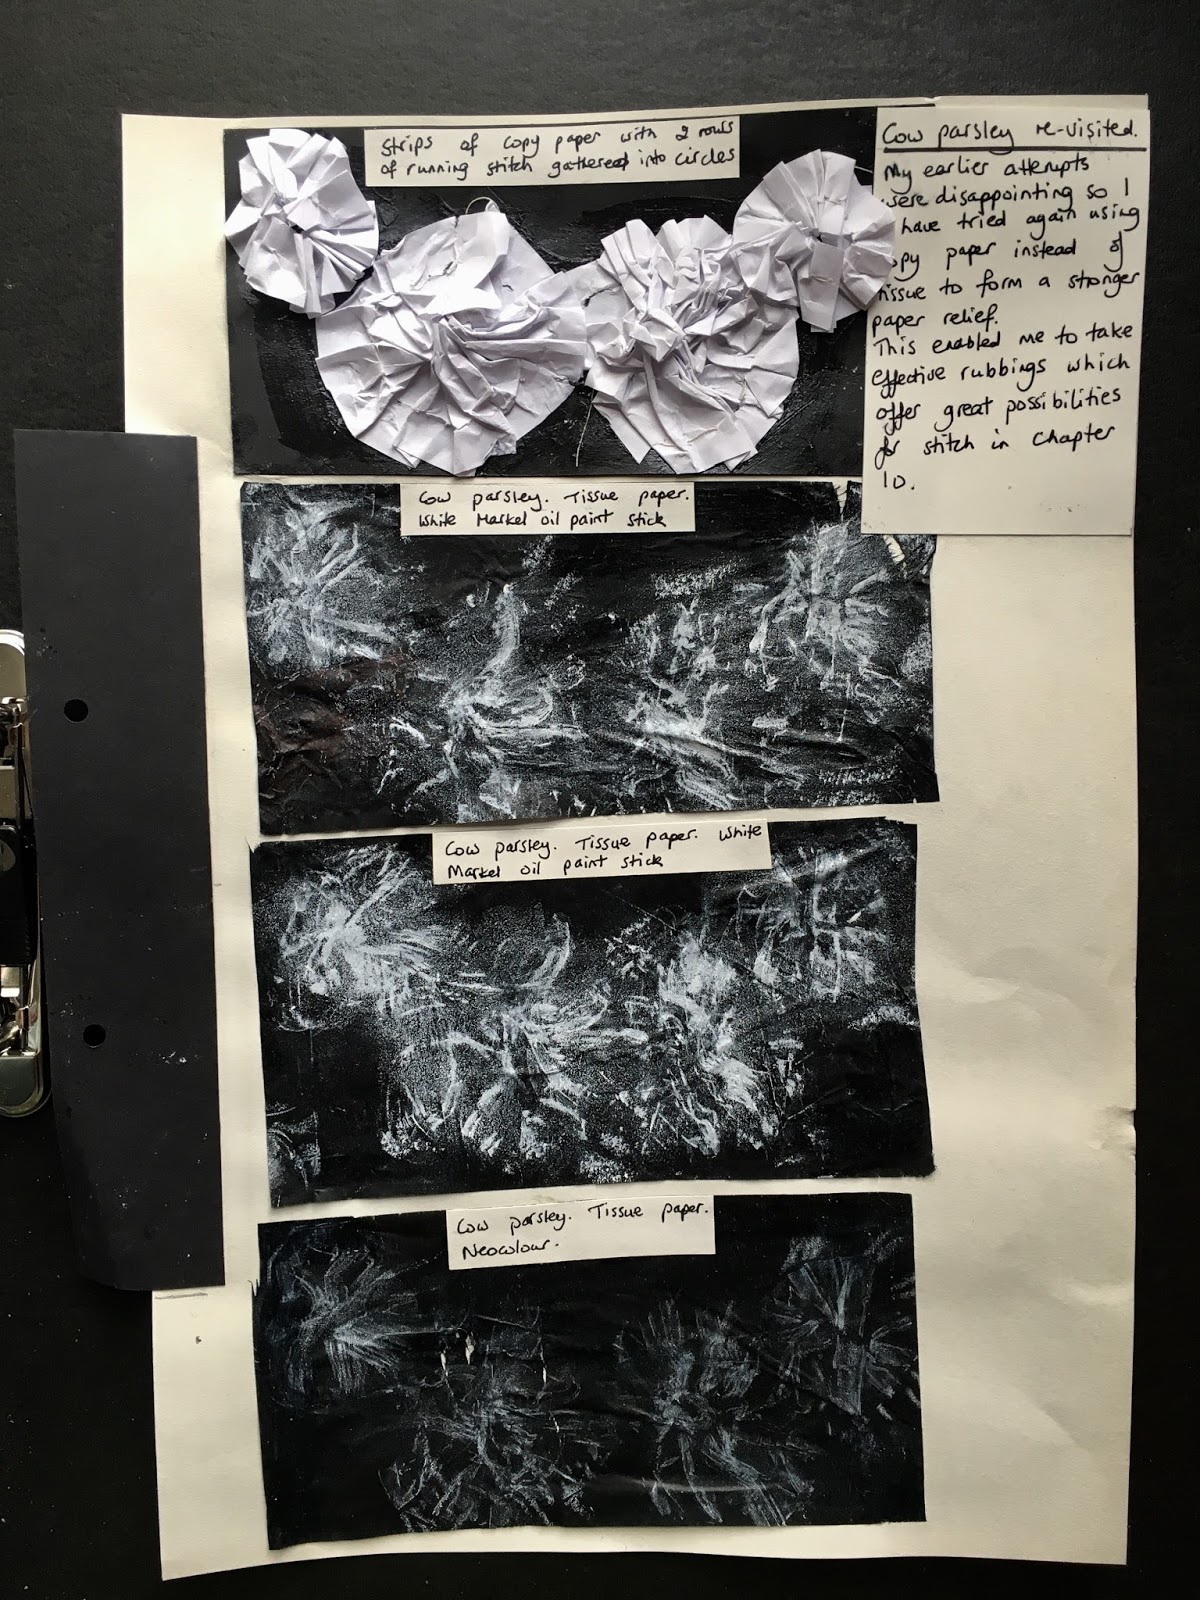
Through taking rubbings of my relief surfaces I have created marks that relate to the surface beneath whilst creating a different interpretation; through this they provided a fresh perspective. 
I've used  light weight black papers i.e. tissue paper and a 80 gsm paper [other heavier papers were too thick for a rubbing to appear] with either a white Markel Oil Paint Stick or Caran D'Ache Neocolor wax pastels which were both soft enough to create a good rubbing  whilst other harder crayons etc left a poor result and tended to tear the papers.
Another option was a white copy paper rubbed with a white candle to form a resist against a wash of black Quink Ink.

Each sample is labelled accordingly below:

9.17, 9.18, 9.19, 9.20 & 9.21

These will be used to inform stitchery in the next chapter and to provide new textural and design ideas where a different angle is  required on a raised surface.
I can see many possibilities already and can't wait to get started on these!

Friday, 26 January 2018

Module 5 chapter 8 continued....

A full set of samples!


I'm very proud of these samples and love the contrasting features of the paper and fabric!

Sunday, 31 December 2017

Module 5 chapter 7 Tactile Contrasts

This chapter involved making an experimental sampler using different fabrics in different manipulative ways.
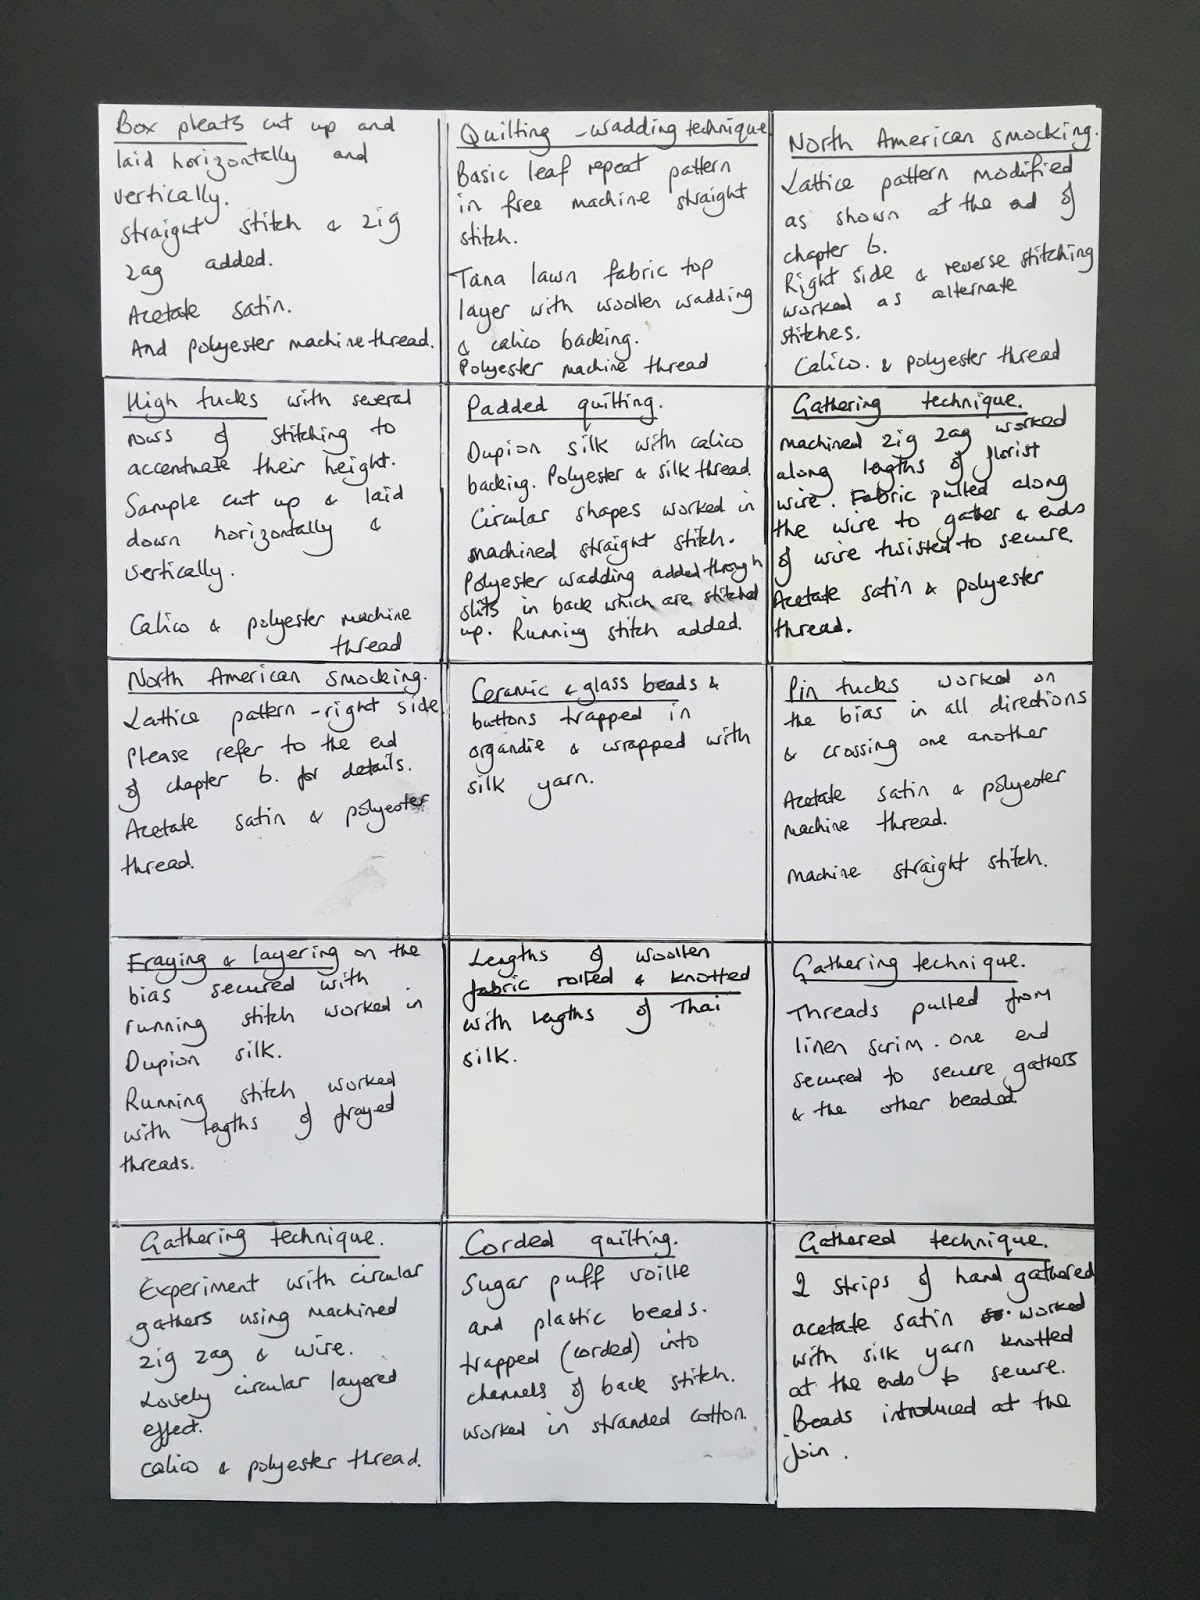
The brief was to use plain white fabrics, a black or white background and a toning sewing thread to produce a set of samples measuring about 4 x 4cms arranged in a grid like fashion whilst paying attention to the edges which would add to the finished effect.
The idea was to make as many differing contrasting squares as I desired as long as they felt different. 

This meant that a range of textures would need to be worked out by choosing suitable techniques, fabrics and stitchery. I've used the samples worked in previous chapters to guide me whilst bearing in mind the research images gathered in chapter 1.
The techniques and fabrics I've chosen demonstrate how these characteristics can be achieved through manipulation whilst paying attention to the individual differences of each.
I wanted to make the most of the interesting shadows and reflections cast by the samples and to achieve this I decided to use a white background and paid attention to the edges of each square and the spaces between them to add to the finished effect.

I've arranged the squares to try and promote the best contrasts for touching and feeling namely hard or soft, high or low, smooth or ridged / spiky  and experimented with a video  taking a close up journey over the surfaces of each one to try and evoke a sense of how they might feel.


                                                Finished sampler with written guide below:


Tuesday, 19 December 2017

Further experiments with North American Smocking for chapter 6

My last set of samples of North American smocking revealed an interesting pattern on the reverse which seemed to resemble patterns on the Ivy Clad Ditch research photos in chapter 1.

Sian suggested I try making samples combining the front and reverse patterns on one side of the fabric. Great minds think alike as these had been my thoughts too! So glad Sian suggested it.

These are my trials:
Lattice patterning:
Sample 1 shows two rows of reverse and two rows of the right side stitching
Sample 2 shows alternate rows of reverse and right side stitching


More lattice patterning:
Sample 3: Alternate stitching along the rows. I worked a stitch and then flipped it over to work the next on the other side.
Sample 4 : An alternate simplified  form of lattice stitch 
Lozenge patterning:
Sample 5: Lozenge pattern [right side]
Sample 6: Lozenge pattern - alternate rows of right side and reverse side stitching.


Lozenge stitch reverse:


I thought it would be fun to lay some of these samples against the original research in chapter 1


I enjoyed this and can see interesting tonal shapes and patterns which may be wonderful in later stages when I start to pull ideas together. I'm thinking ahead to stitching and maybe introducing some needle weaving along the threads on the reverse sides to add texture at a later stage.


Wednesday, 15 November 2017

chapter six post script

I came across some beautiful North American smocking which reminded me of the ditches and ridges in my research pics in ch 1 and 3.
I had a go and very pleased


And the reverse of the lattice pattern which reminds me of my ivy clad ditch in ch 3


To await development................!

Chapter 6. Tucks and pleats and gathers

This chapters is all about tucks, pleats and gathers and the many ways in which we can experiment with different ways of tucking, pleating and gathering a piece of fabric.

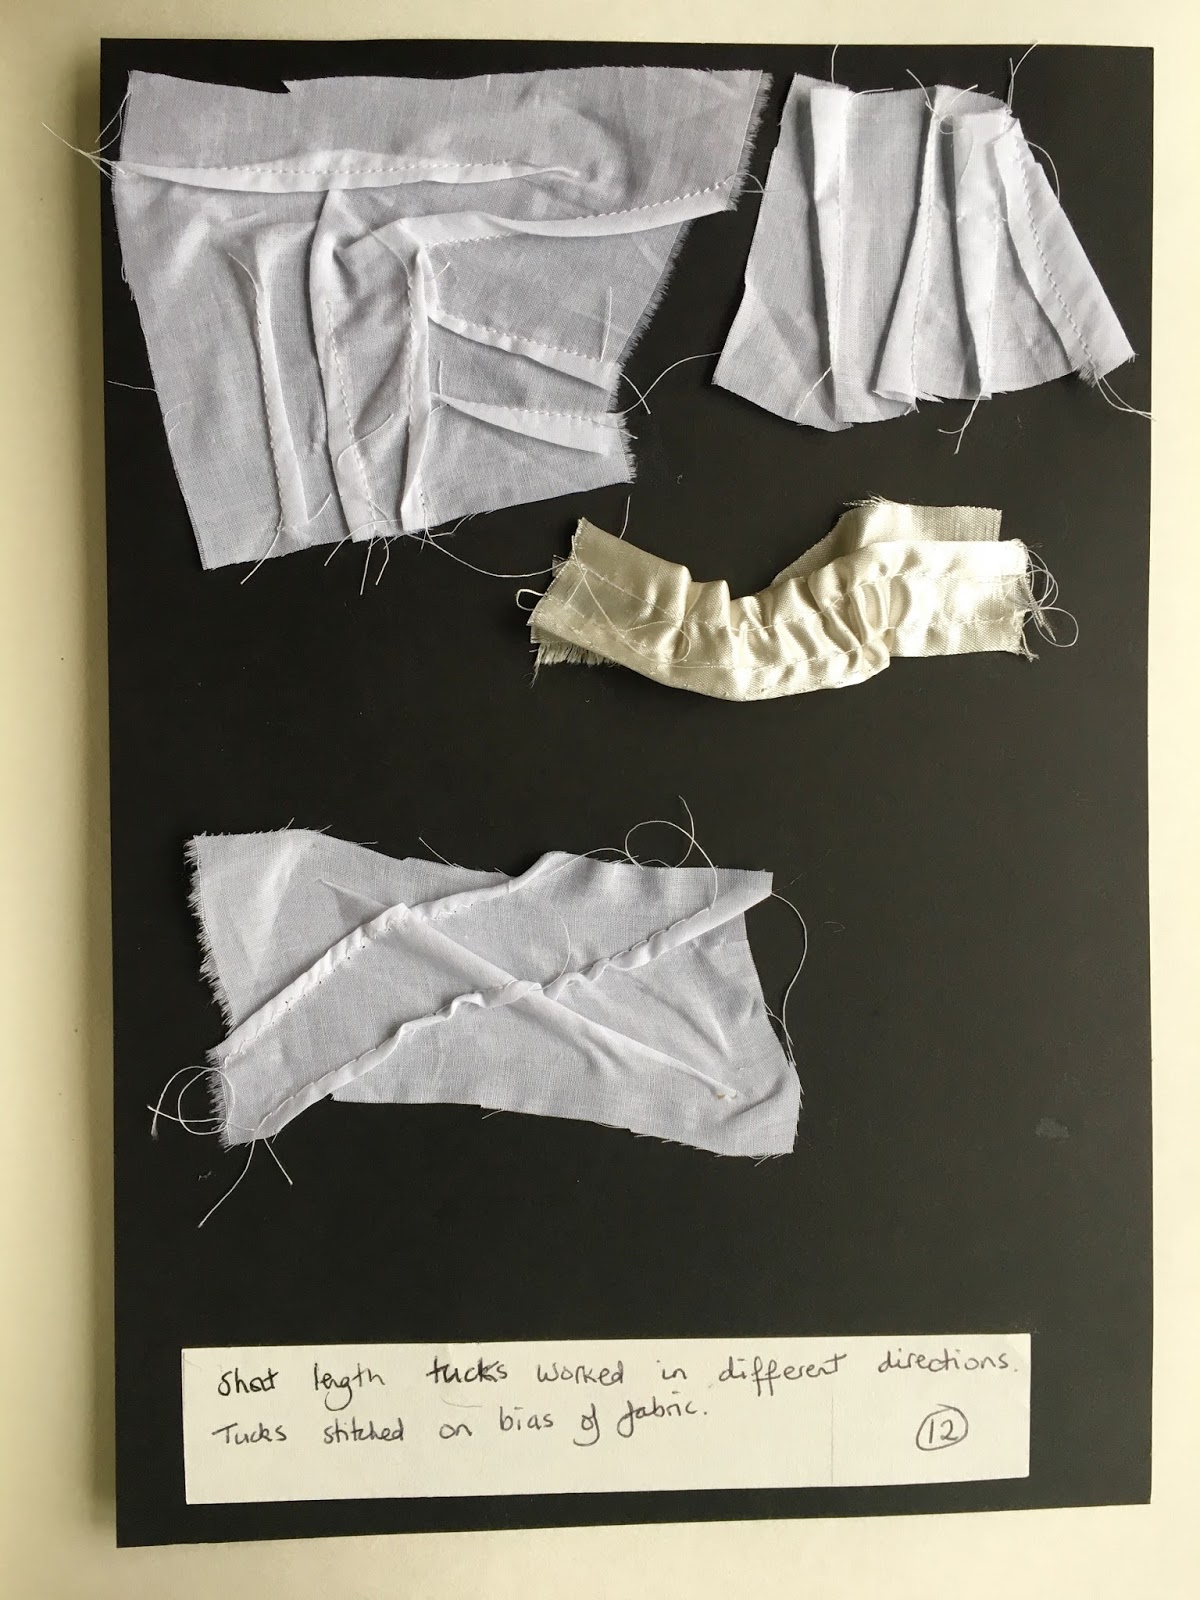
A tuck is stitched along it's length
A pleat is pressed into shape
A gather is pulled along a thread, stick or ribbon.

The following pages show how I have investigated these methods.
I have so enjoyed this chapter - so many surprises and gorgeous effects as I worked my way through the chapter's contents. So inspiring. Thank you Sian!
I've used a wide variety of fabrics and threads to demonstrate how different textural and tonal effects
can be achieved and tried to use my imagination to create a diverse set of samples.


Tucks first:
Looking at various methods, each method is labelled and spans over 13 samples:


This sample shows a selection of tuck methods combined every which way!


Gathering techniques:

In experimenting with gathering techniques I've used a variety of hand and machine techniques to achieve many effects. I haven't, however, been able to find a gathering or pleating machine for this section but hopefully this selection will suffice.


A selection of gathering techniques attached to a background fabric and worked to show textural and tonal effects:


Below are samples whereby different weights of fabric have been joined and gathered and then fashioned into a circular shape. I love this sample and feel it is beautiful inn it's own right.


Following on from the gathering methods we now move on to the use of stitching both by hand and machine to demonstrate the holding and decoration of gathers.
The next samples look at smocking firstly on scrim and then a more delicate tana lawn. I especially enjoyed working the irregular cable stitch on sample b.whilst thinking of the ridges and channels in the ditches in chapters 1 and 3.


A variety of fabrics stitched together and gathered before being placed on a separate background fabric and then decorated with enhancing machined satin stitch


Further gathering methods:


The use of buttons, beads, shells etc to add more delight!


I have so enjoyed this chapter and can't wait for the next to take these techniques further.

I have another image to add showing North American smocking but will have to postscript as it has failed to download


Wednesday, 20 September 2017

Chapter 5 Quilting techniques


Quilting techniques involve layers of fabric with padding  placed below the top surface, stitching is added to hold the layers in place. This chapter looks at the wadded, shaped, padded and corded methods of quilting.

I've worked with some traditional methods of quilting in the past but have been fascinated by the experimental samples with unconventional fillings and padding used here.

I've uploaded my sketchbook pages starting with the wadded technique. I've started by using conventional methods and then moved onto more experimental materials in later samples .

Wadded method:


 I used the strips of fabric at random as wadding, I love the unfinished edges.


You can just make out the small circular shapes of the waste from my paper hole puncher here!


I think this feathered filling below is my favourite, I love the swirling effect of the feathers and the soft tonal qualities.
Sample 10, however, is taken from another piece of work completed some time ago but I felt it could be really useful - especially as a possible interpretation of the 'ivy clad ditch' in chapter 3 sample 5.


Shaped quilting:

This involves two layers of fabric with the shapes placed upon the backing fabric [ I used a little glue to keep them in place] before adding the top layer of fabric and carefully adding the stitching.

We were encouraged to try out different top fabrics and fillings for interesting results, especially see through top layers revealing the unusual fillings beneath!


Padded quilting:

 Padded quilting is comprised of a top and backing fabric which are stitched together first and the padding added afterwards through the back layer. To achieve this a slit is made within the stitched shape, the padding inserted and the slit slip stitched back in place.
It was fun trying out various shapes and unusual paddings. 


This piece of trapunto was completed previously, I apologise for the pink but I thought it was a lovely example.


Corded quilting

I tried some by hand - using back stitch either side of the cord, I especially love the effect of the sugar puff voille and the beads!  The others are by machine using straight stitch and a double needle was used for sample 4 which seemed to have a life of its own as it sprung to life! The backs views were good too especially sample 1!


Back views: